How I fixed my Apple TV thermal throttling for under $15
Like many have reported the Apple TV 4K 2022 gets very hot, and can start thermal throttling. This is most often a problem for me playing 4K blu ray disks I’ve ripped and then play through Plex. This is reportedly due to Plex’s tvOS player not properly using the hardware decoder causing it to use significant and sustained CPU usage. Many folks have moved to alternate players such as Infuse which properly utilize the Apple TV’s hardware thus avoiding the thermal throttling.
I only have this issue with 4K movies and prefer the Plex UI, nor was I thrilled about having to purchase a separate app for this. I already had a heatsink and a fan sitting around and figured I could rig something up quickly and cheaply enough to hopefully fix this.
Measuring the problem
I wanted to try and gather as accurate information about this as I could, however in typical Apple fashion there is no exposed temperature reading for the Apple TV, at best there is a thermal status which can report Normal or Serious.
I would only start to see issues after about 1.5 hours of playback which made these quite difficult to initially troubleshoot and confirm my solution actually worked. I turned on the debug video player overlay in Plex to monitor the dropped frame count during playback which gave me a concrete number to compare across tests.
My Apple TV sits in a closet in a 3D printed enclosure that has rack ears. I hooked up an ESP32 with a DS18B20 temperature sensor and then taped it to the top of the Apple TV as that seemed to be the hottest part. The ESP32 reports the temperature into Home Assistant which then feeds into InfluxDB, giving me a full time series to look at in Grafana.
It’s worth noting that I moved the sensor partway through testing from the center of the top to the corner, which definitely reads a lower temperature than the hottest point on the surface. The relative trends between tests are still valid but the absolute numbers after the move are several degrees lower than the true peak.
Baseline: no cooling
When I hooked up the sensor the Apple TV had already been on for several hours and had been playing non 4K content before this test so the starting temperature is already quite elevated. With no cooling solution at all I started a 4K movie and watched the temperature climb even further, quickly shooting past 45°C and peaking near 50°C.
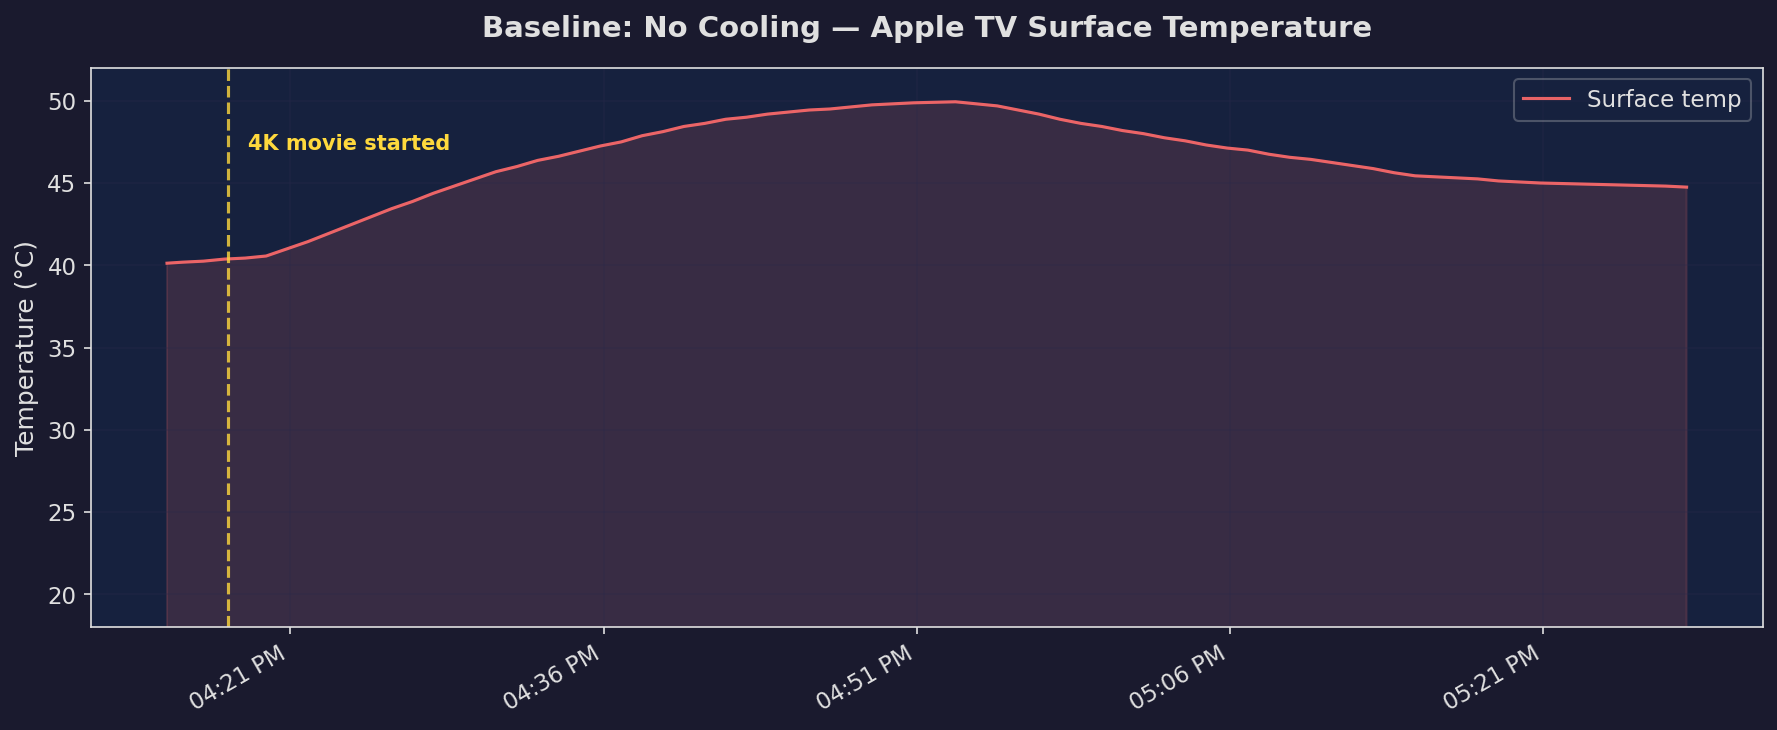
The video started to stutter and Plex was recording dropped frames. I confirmed with the app TV Stats that the thermal status had switched to Serious.
How I solved it
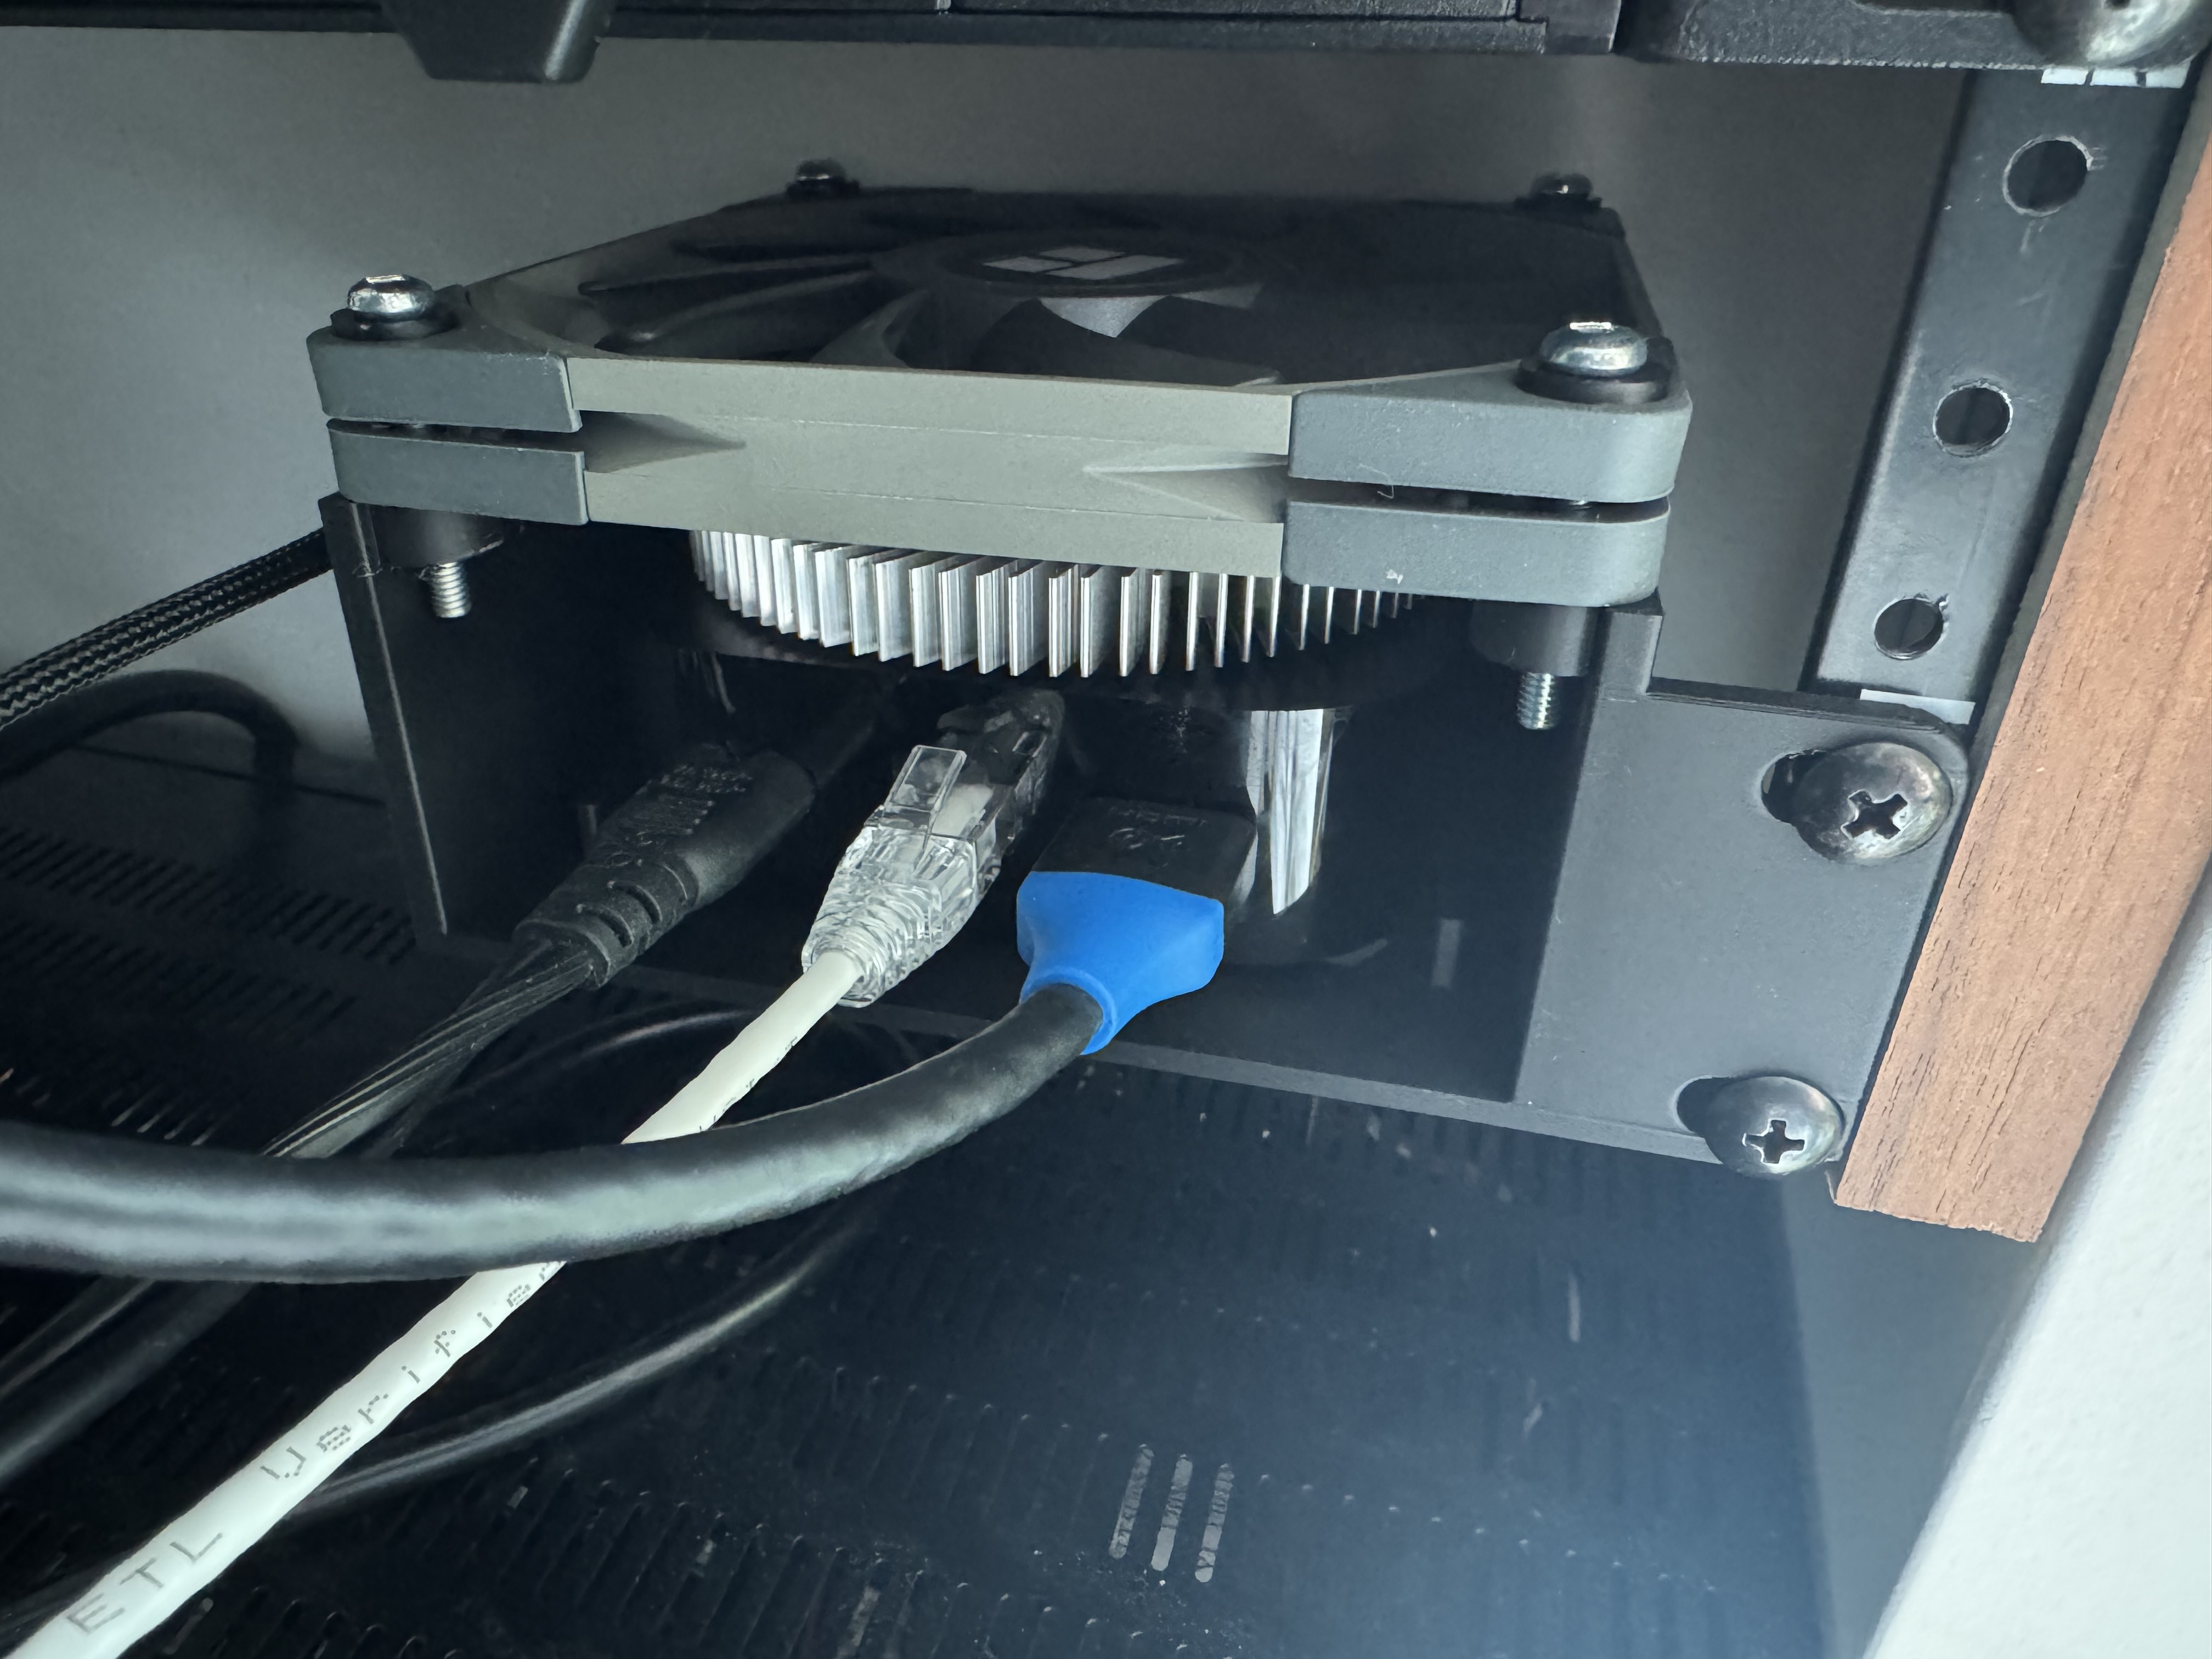
My Apple TV sits in a 3D printed rack mount enclosure that I designed. I updated the design to include space for a 10mm heatsink on top of the Apple TV and a 120mm PC fan mount. The heatsink sits directly on the Apple TV’s top surface and the fan blows air across it.
For power I’m using a cheap USB-C PD to 12V board from AliExpress to power the 120mm fan. I designed a small enclosure for the PD board that tidies up the wiring and gives me a clean 4-pin fan connection. Paired with the IKEA SJÖSS which I bought for $5 this makes for a very cheap way to get reliable power without dealing with bulkier dc adapters.
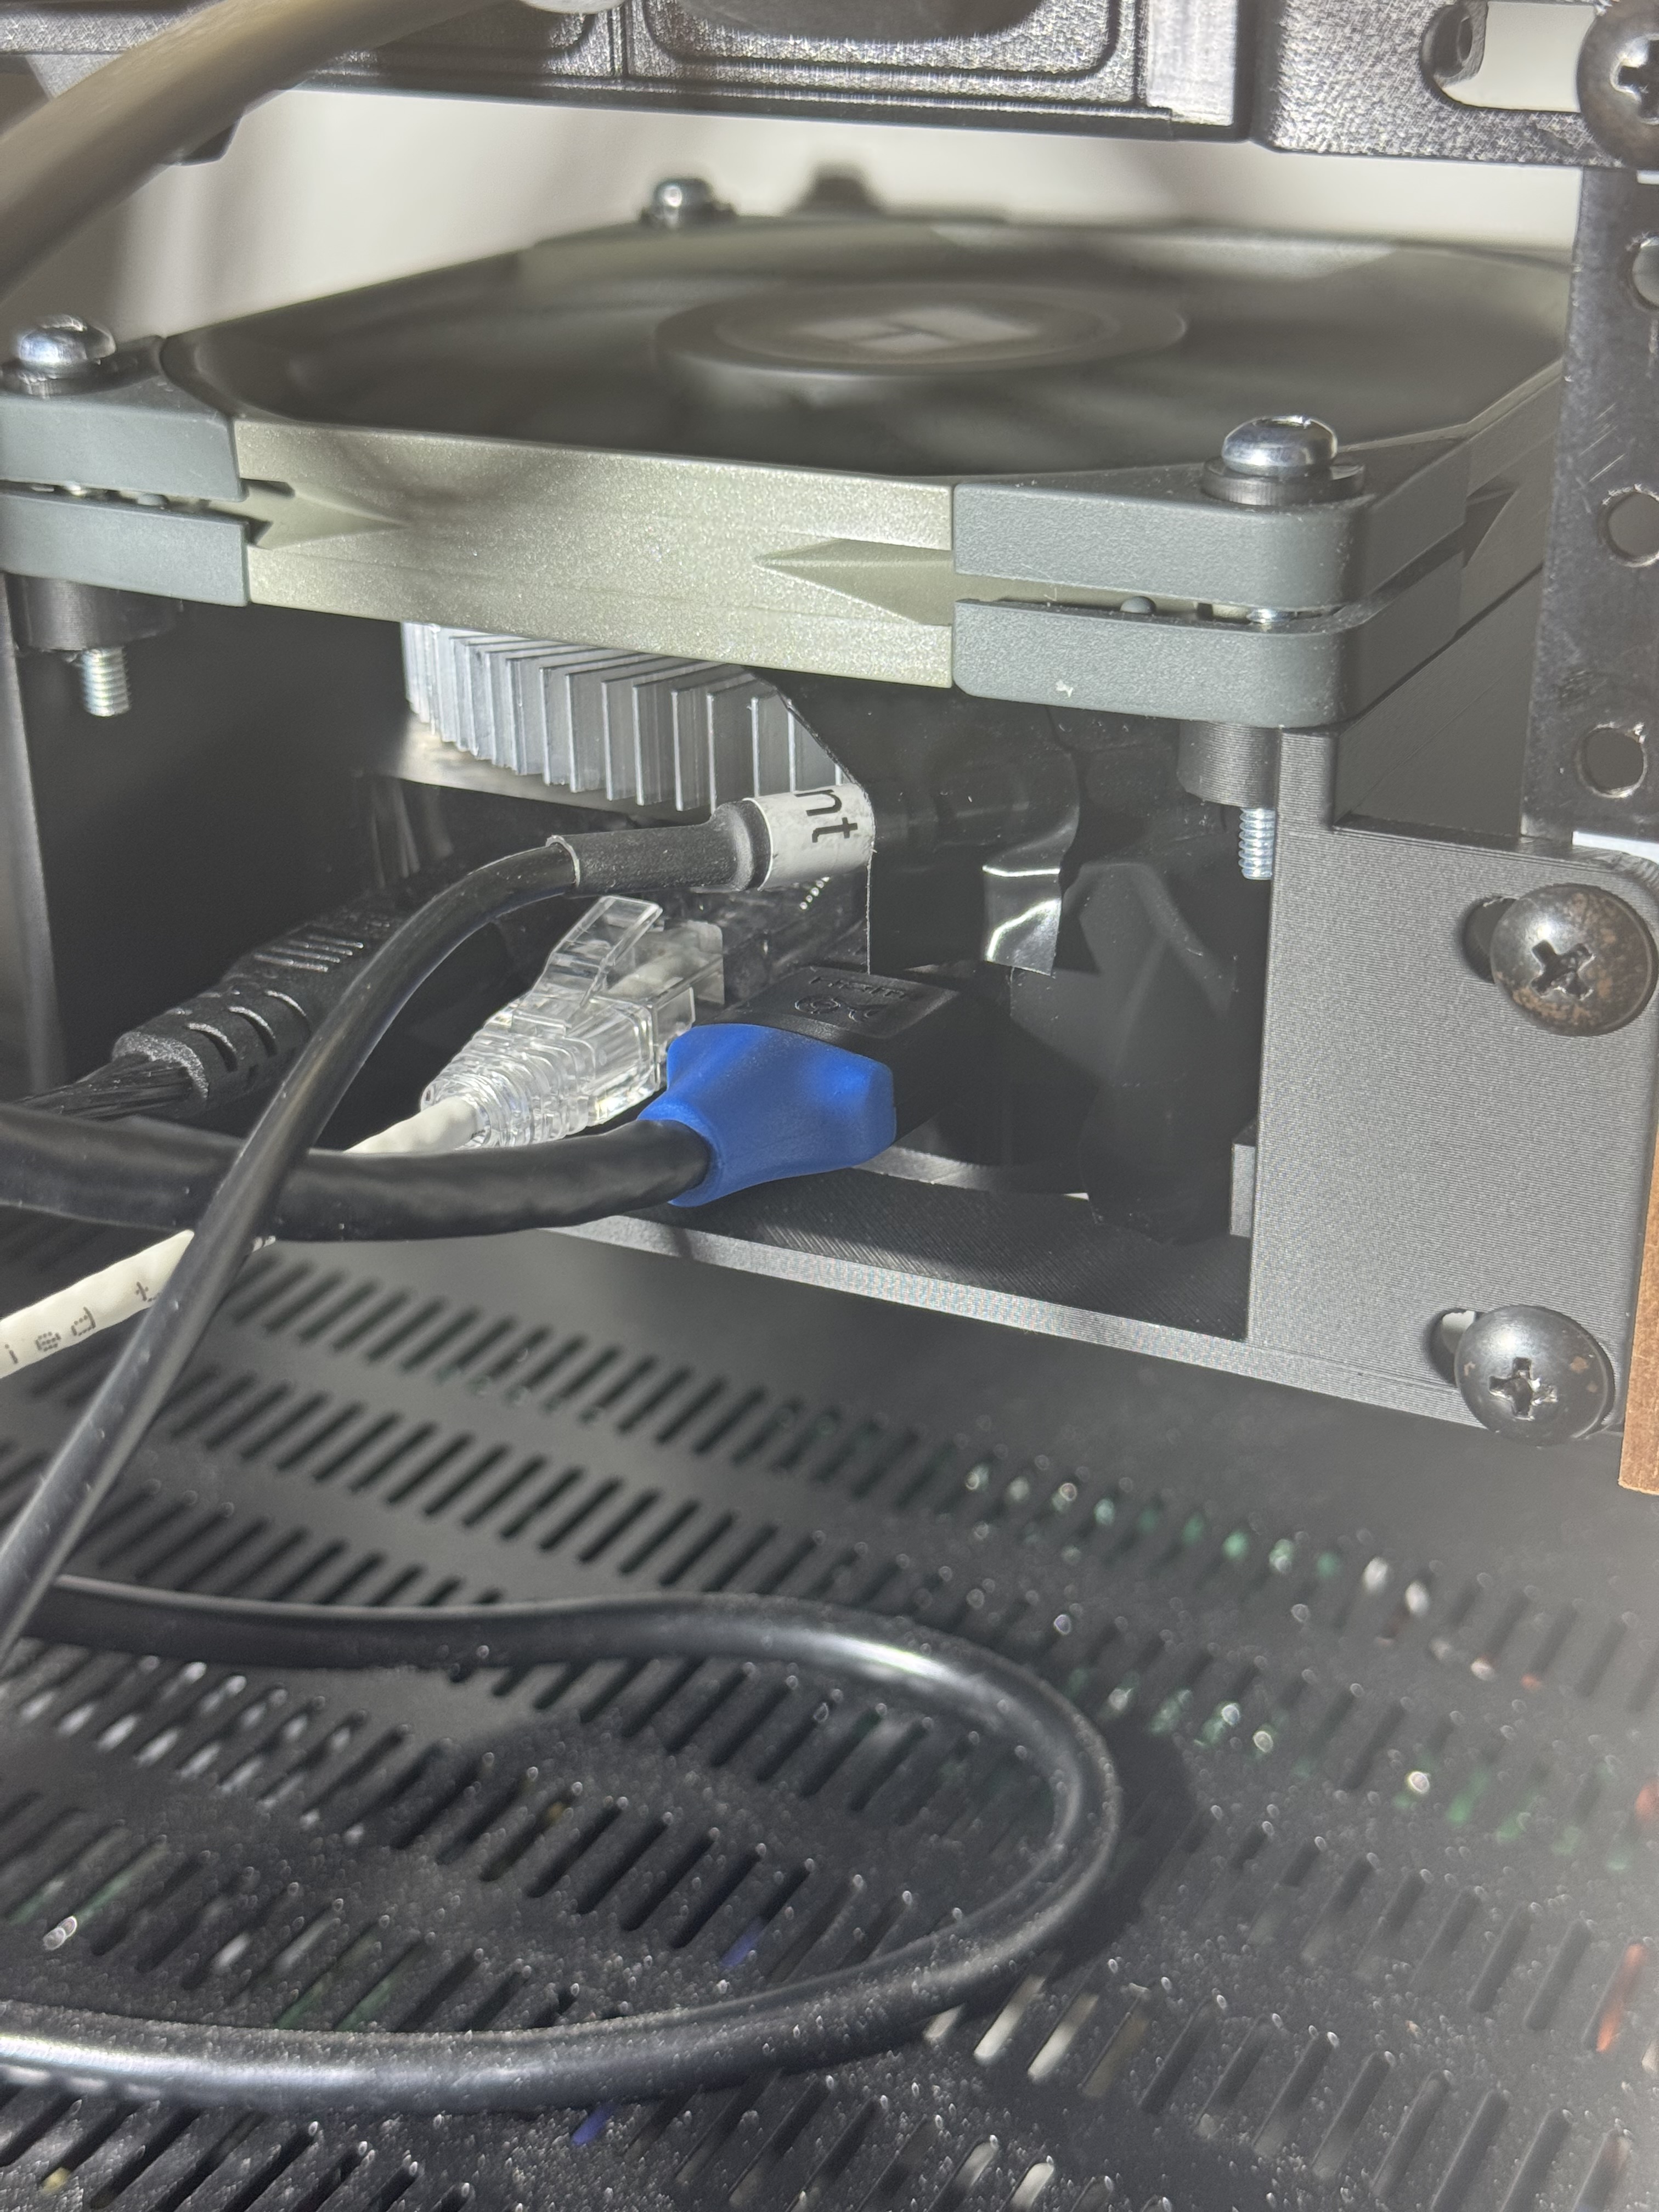
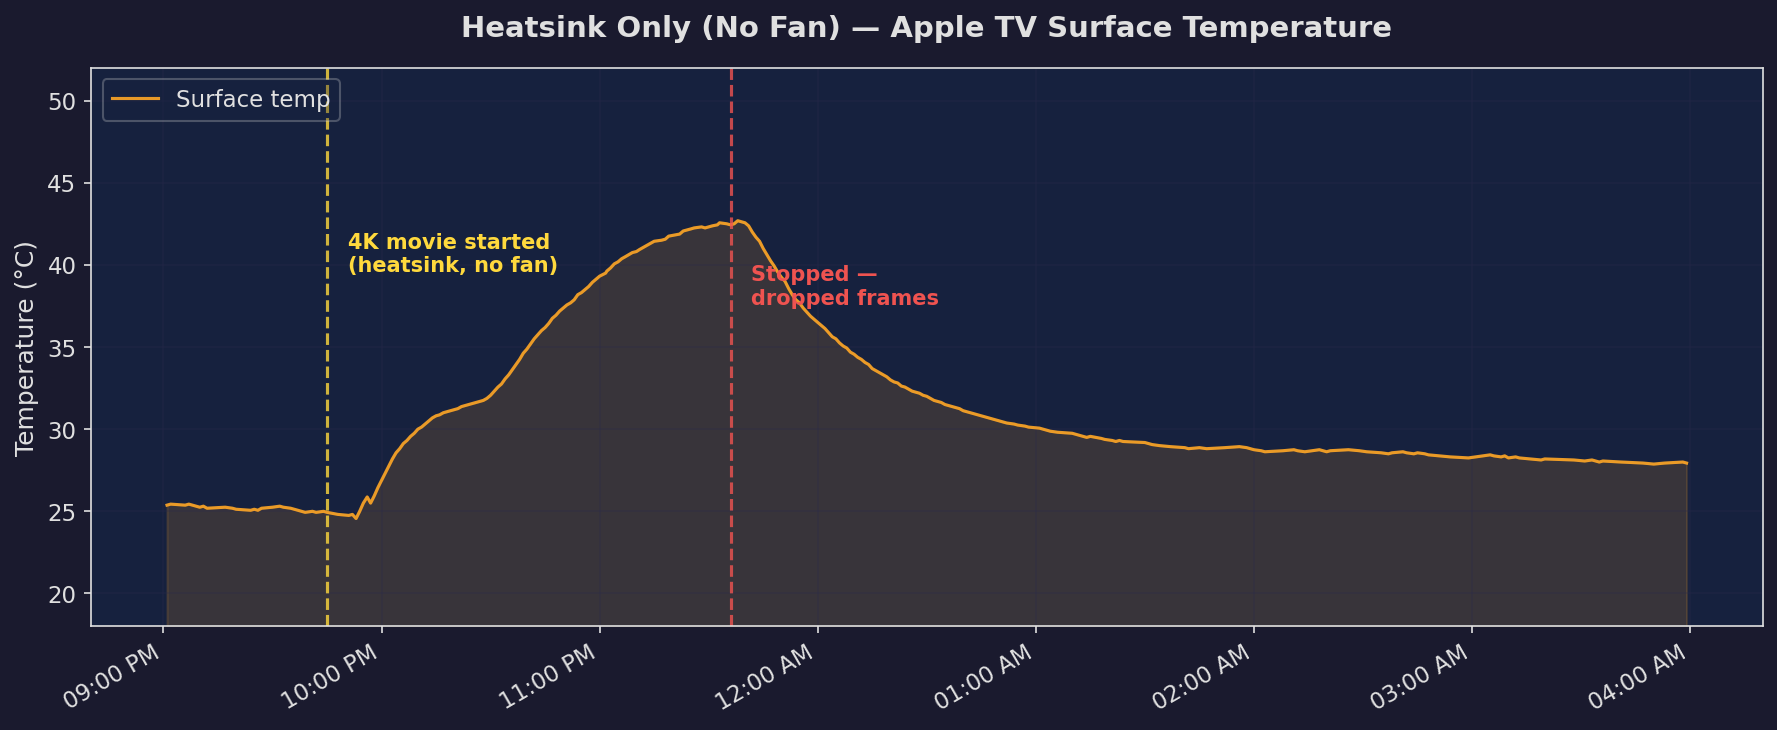
Heatsink only
I first tested with just the heatsink installed and no fan to see if passive cooling alone would be enough. I had to move the temperature sensor to the corner since the heatsink needed to go where the sensor originally was, so the readings are slightly lower than they would otherwise be but ultimately I only care if I have dropped frames. The heatsink is attached with some thermal pads.
The temperature rose slower than the baseline but still ultimately ended up thermal throttling and dropping frames. A heatsink with surface contact across the entire device may have helped, or perhaps a bigger one, but I was just working with what I had laying around.
Heatsink + fan
The next day I turned the fan on and ran the same test, playing back to back 4K content for 8 hours straight.
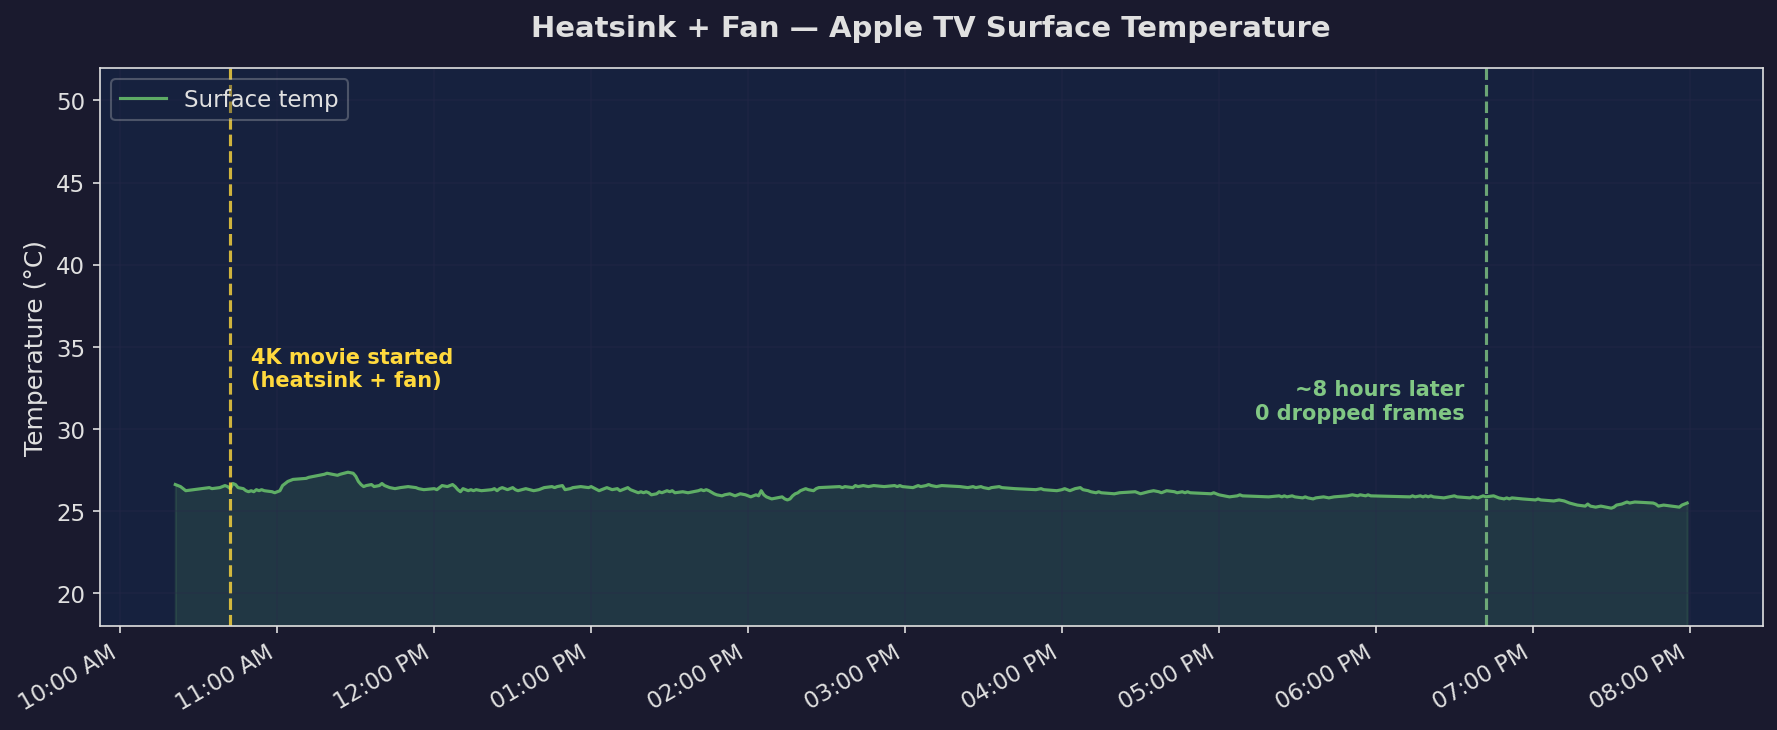
The difference is dramatic. The temperature readings actually went down ever so slightly from where they started. The important part is that I didn’t have a single dropped frame. The fan pushing air across the heatsink is doing exactly what it needs to, moving heat away from the Apple TV fast enough that it never gets anywhere close to throttling.
Results
The combination of a heatsink and a fan completely solved the thermal throttling issue. The heatsink alone helped but wasn’t enough, and adding active airflow with the fan was the key. It’s possible that the fan alone would be sufficient and the heatsink isn’t strictly needed, but I already had it and the mount has space for it so there’s no reason not to use both.
This is a pretty simple and cheap fix if you have the parts sitting around. The alternative is switching to Infuse or another player that properly uses the hardware decoder but I prefer staying in the Plex ecosystem and this works well enough that I don’t have to think about it.
Putting it all together
While I could leave the fan on 24/7 and its power use is basically nothing, I already had everything in place to make the fan a bit smarter. I hooked up the power to a smart plug and then through Home Assistant made two automations: turn the fan on and turn the fan off. Then with Tautulli I created a notification agent that triggers when the user is myself, the player is my Apple TV, and the resolution is 4K. This triggers the Home Assistant automation to turn on the fan. The second notification agent just looks for playback stopping on my user and the Apple TV player.
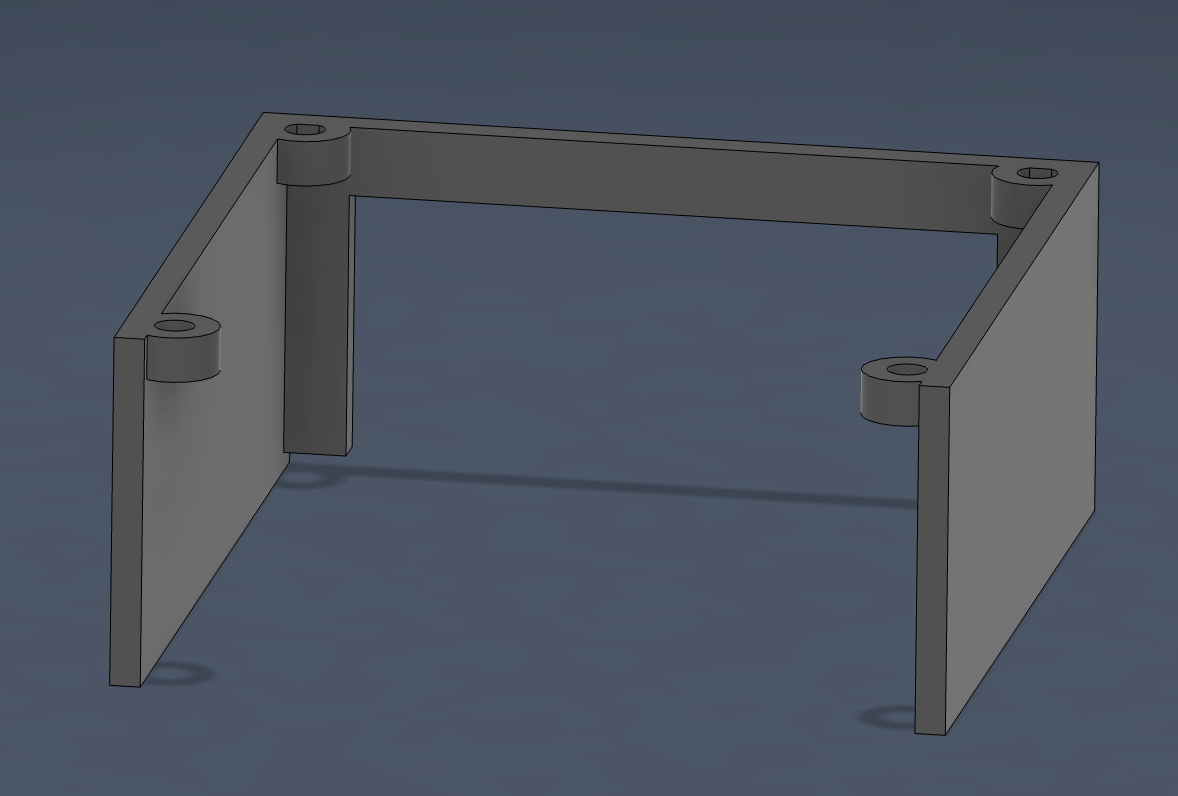
Want to set this up yourself?
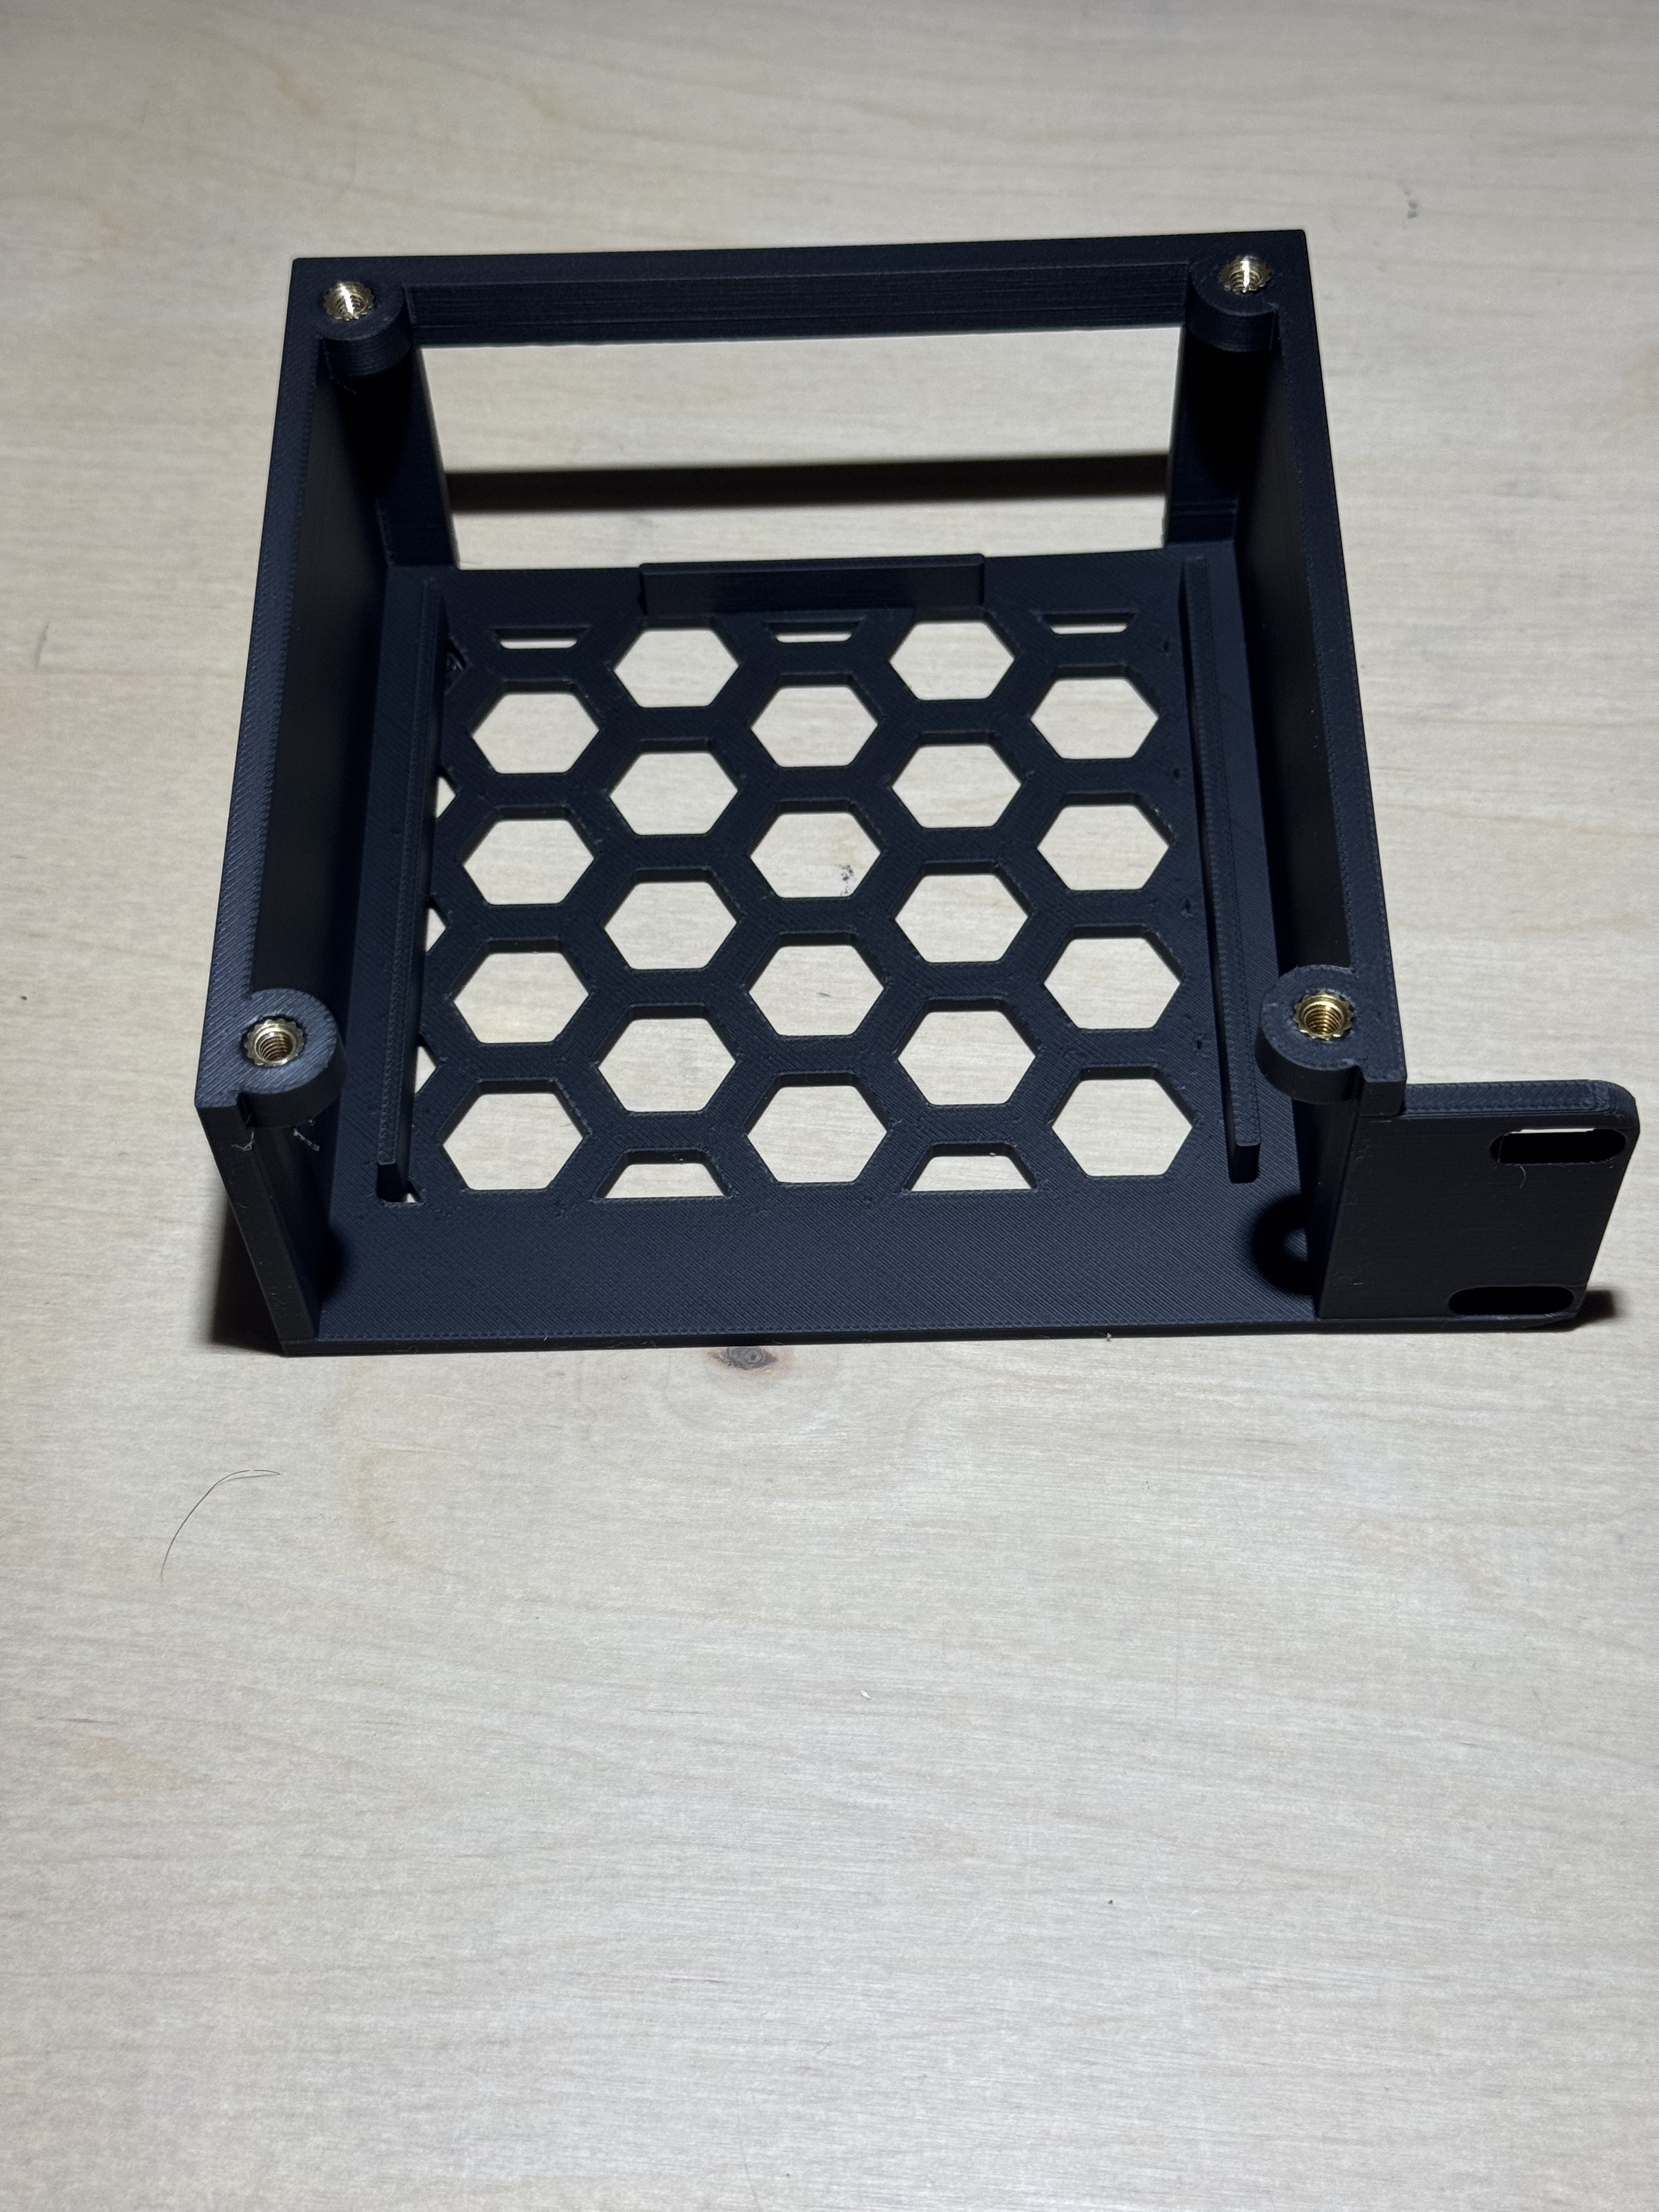
If you just have your Apple TV sitting on a shelf I’ve included a model that’s just the mount for the fan with space for a heatsink. You could easily modify the print to cut off more of the bottom if you aren’t using a heatsink.
Grab the STL you want from MakerWorld:
- Rack Mount Left Ear
- Rack Mount Right Ear
- Fan mount
Parts
- 120mm PC fan
- Power for the fan — this just needs to provide 12V DC so choose your own, but I like the USB-C PD boards from AliExpress paired with a 4-pin female fan header for easy connection
- M4x6x6 heatset inserts to mount the fan — you could use a machine screw and nut or just leave it sitting, however it might vibrate (optional)